How to Use JobGuard Pro
JobGuard Pro helps you get paid for every extra on a job. This guide walks you through the main steps: setting up a job, pricing a change, getting it signed, and getting paid. It takes about 5 minutes to learn.
The screens on this page show sample data, not real customers.
Step 1
Get started
- Download JobGuard Pro from the App Store or Google Play.
- Create an account with your email and a password.
- Open the confirmation email and tap the link to confirm your account.
Your 30-day free trial starts right away, with every feature included.
Step 2
Check the Today screen
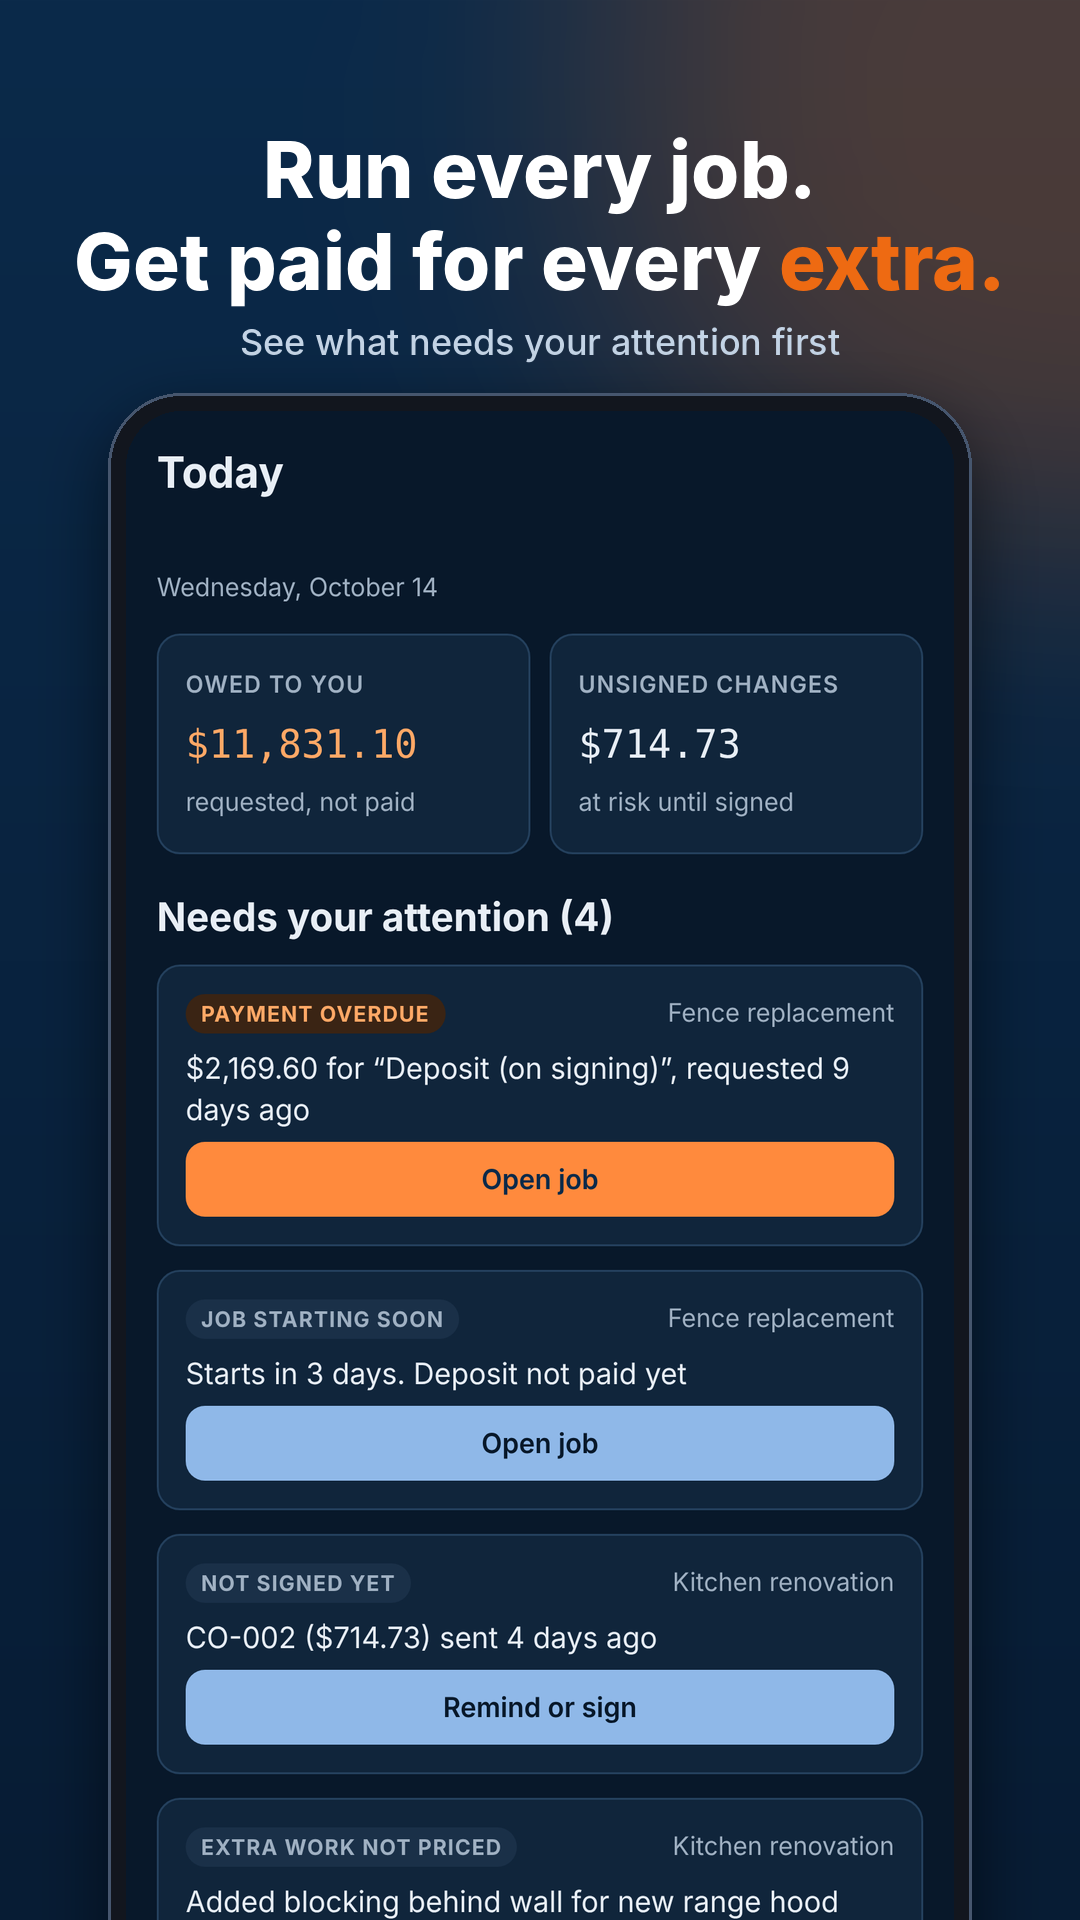
The Today screen is your daily to-do list. At the top you see:
- Owed to you: money you've requested but not been paid yet.
- Unsigned changes: extra work that's at risk because the client hasn't signed.
Below that, Needs your attention lists overdue payments, jobs starting soon, and change orders still waiting for a signature. Tap any item to open the job.
Step 3
Add a job and its payment stages
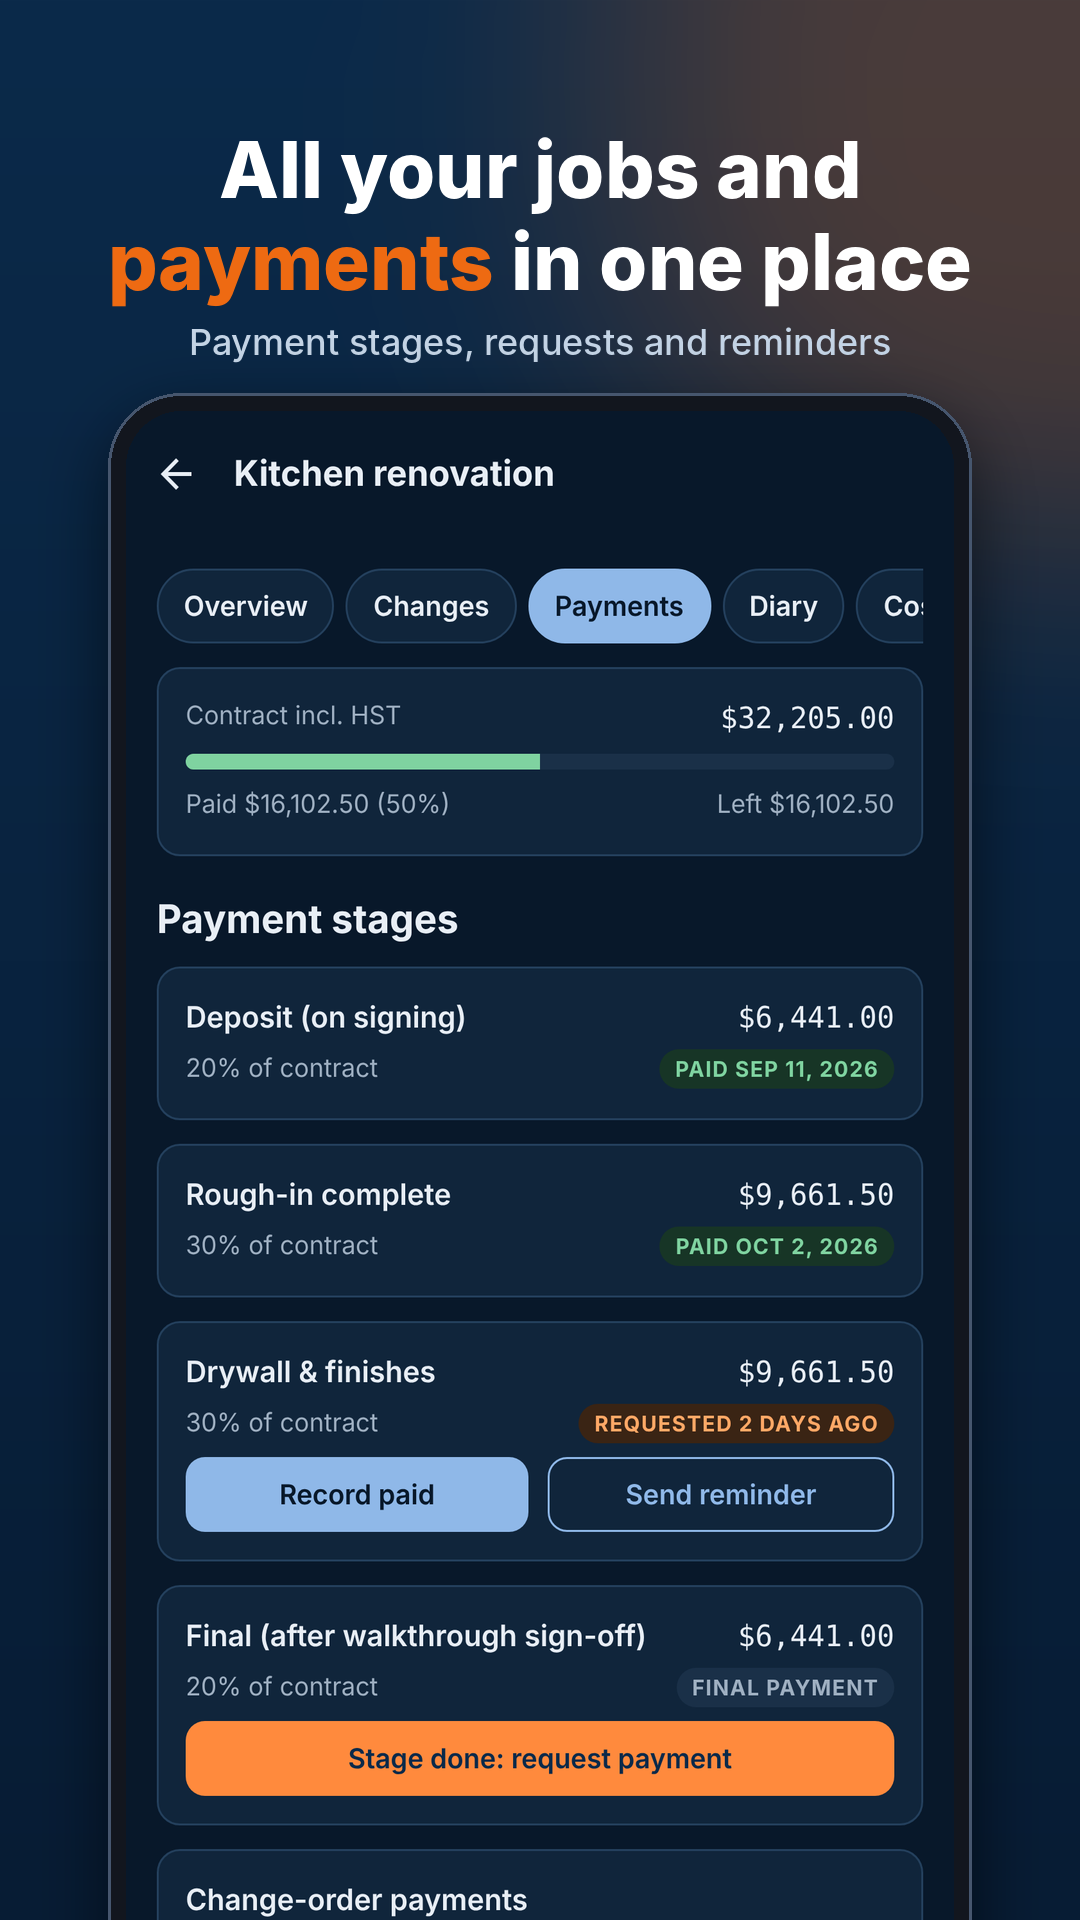
Each job has its own tabs: Overview, Changes, Payments and Diary.
- Enter the contract price and split it into payment stages, for example a deposit on signing, rough-in, drywall and a final payment.
- When a stage is finished, tap Stage done: request payment.
- Use Send reminder if a payment is late, and Record paid when the money arrives.
Step 4
Price the extra work
When the client asks for something extra, open the job's Changes tab and create a new change order.
- Describe the change in plain words.
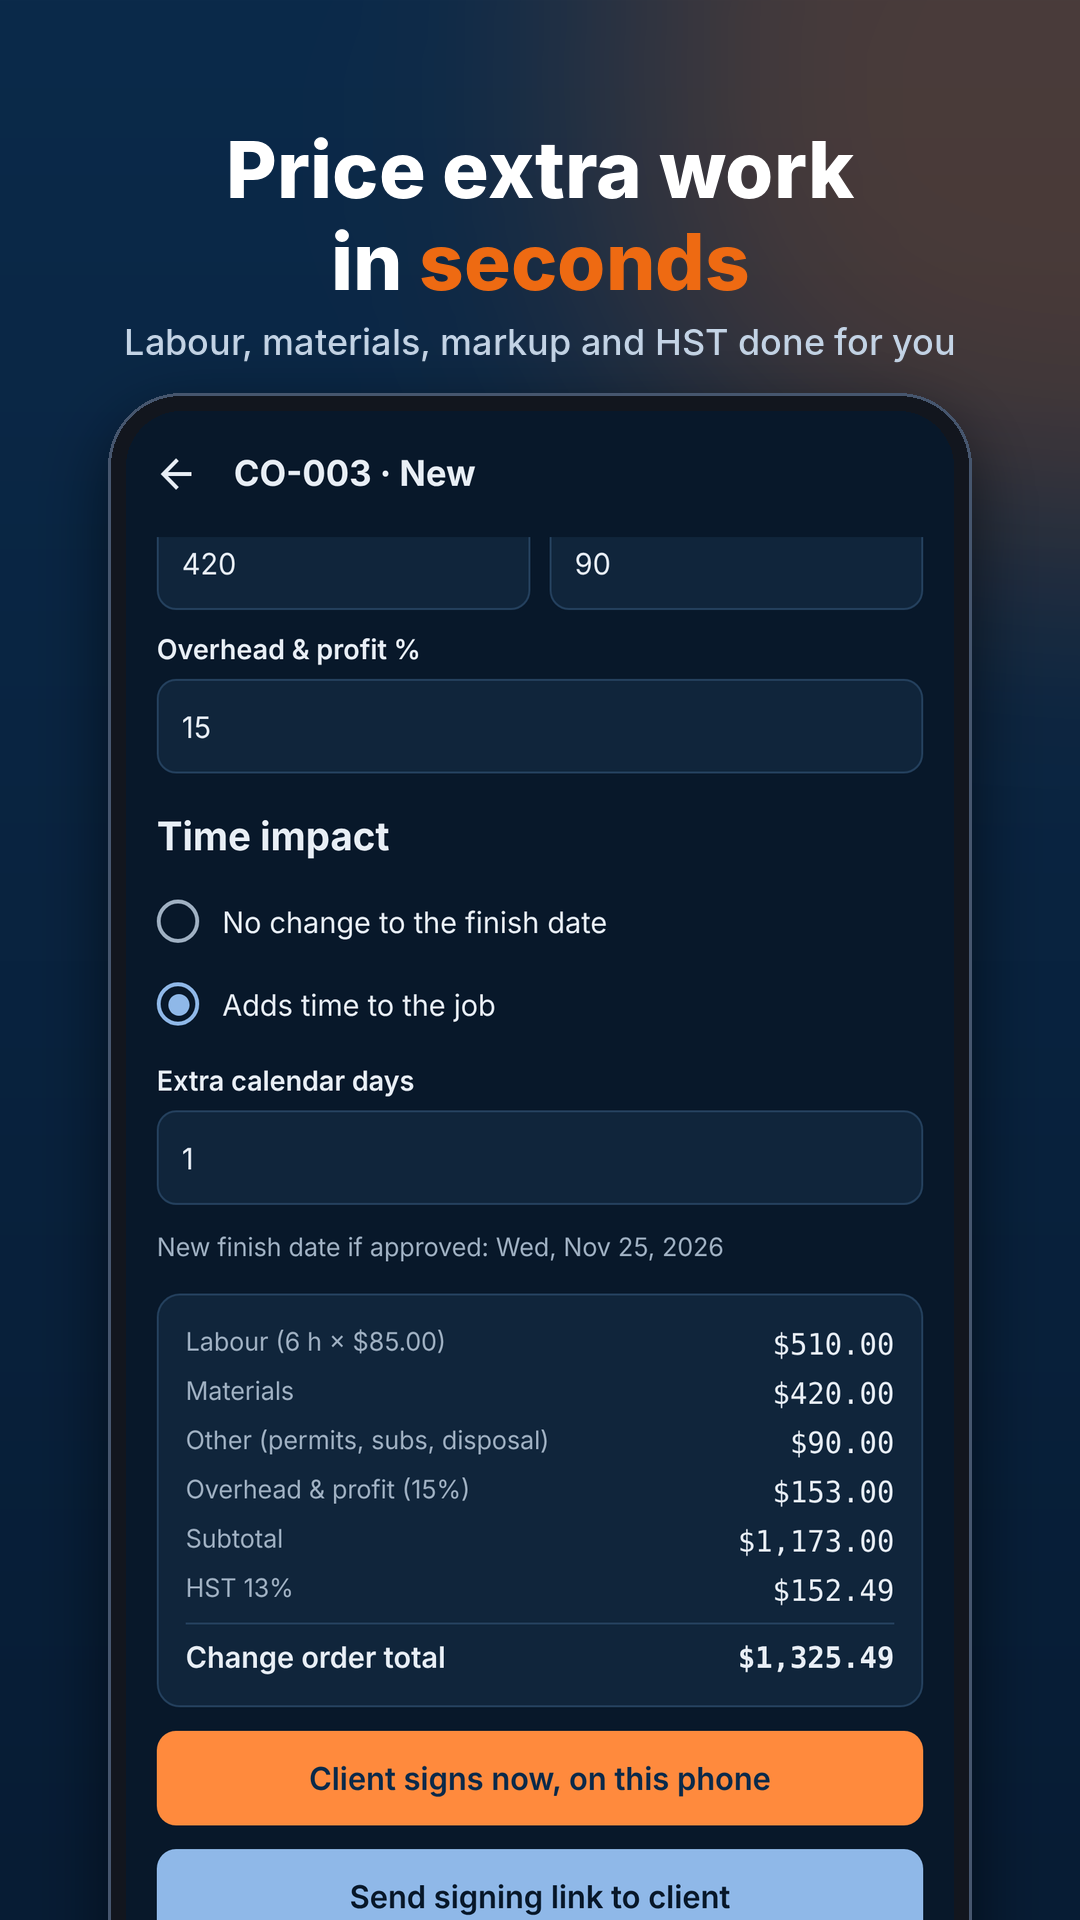
- Add labour, materials, any other costs, and your overhead & profit %.
- JobGuard adds the HST and shows the total for you.
- Under Time impact, choose whether the change adds days to the job. The new finish date is shown automatically.
Step 5
Get it signed
Choose how your client signs:
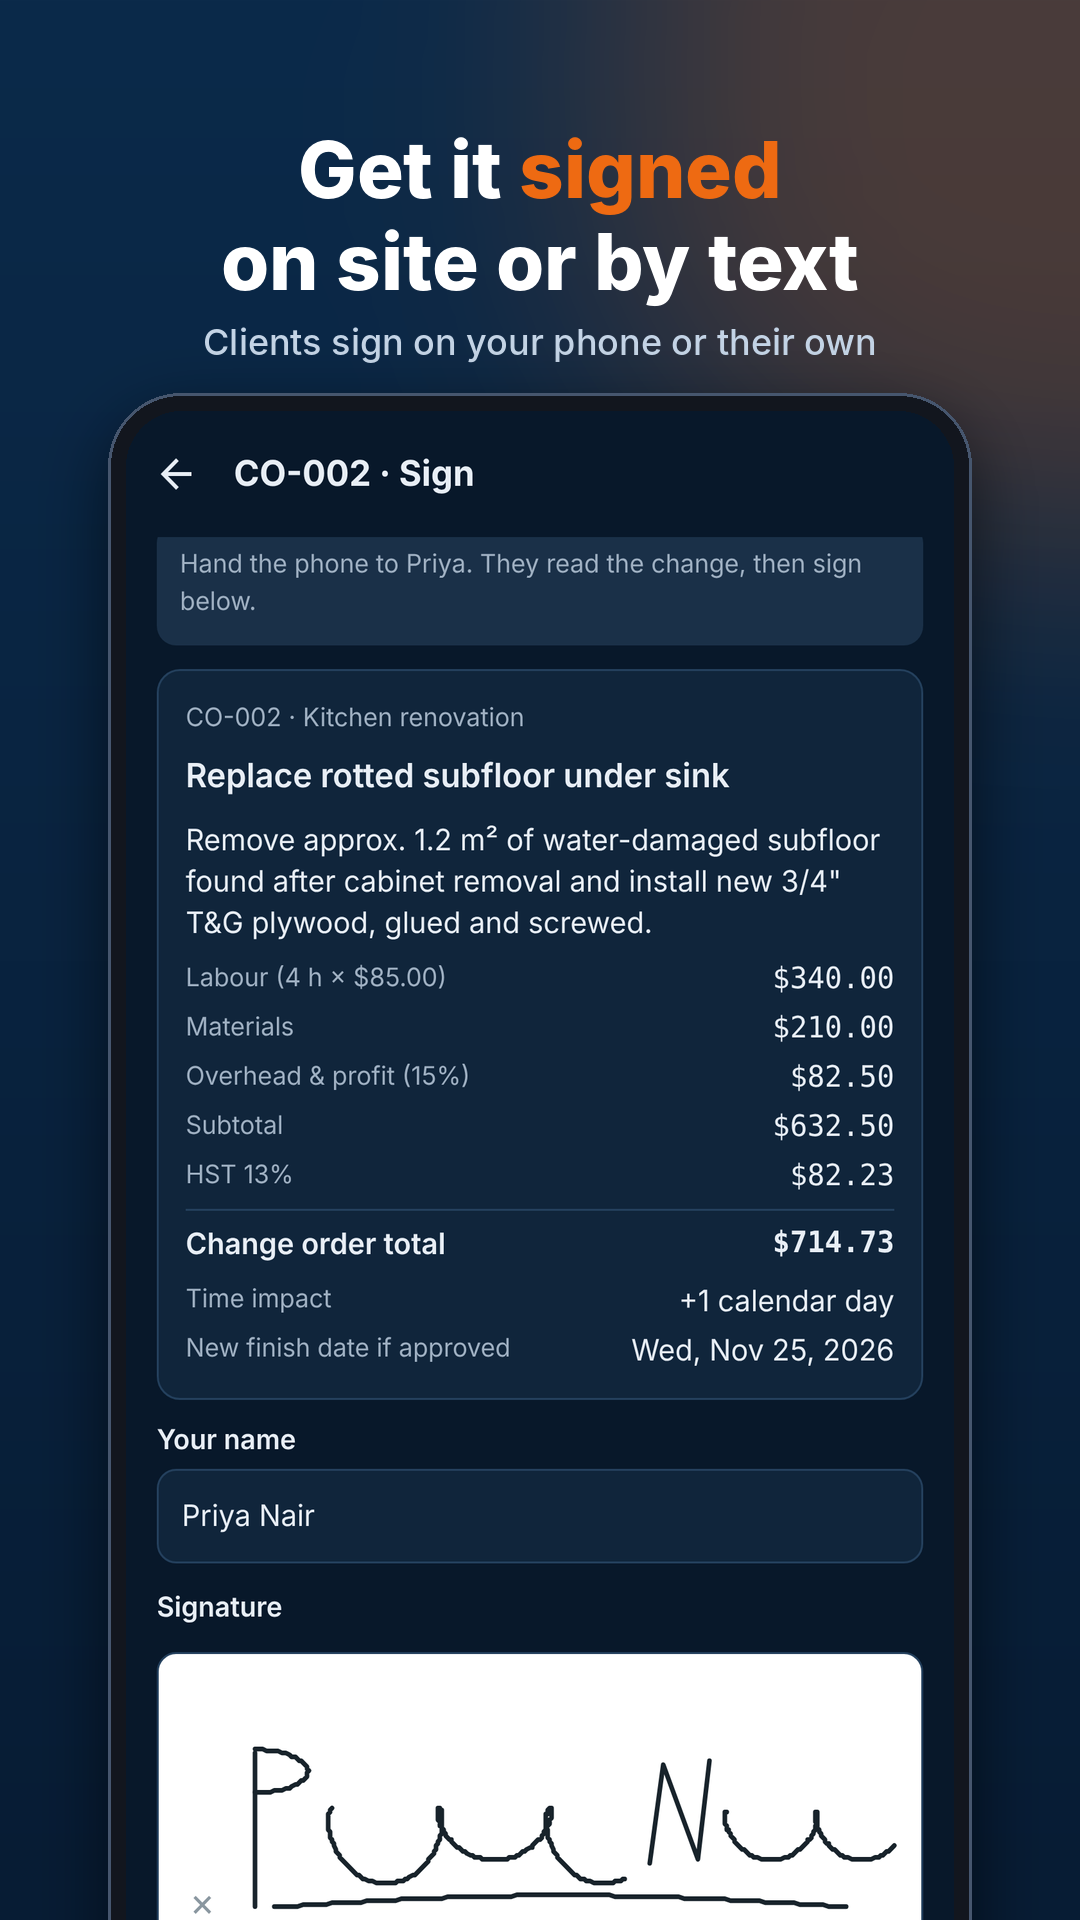
- Client signs now, on this phone: hand them your phone. They read the change, type their name and sign with a finger.
- Send signing link to client: they sign on their own phone. They don't need to download anything.
Get the signature before you start the extra work.
Step 6
Keep the signed proof
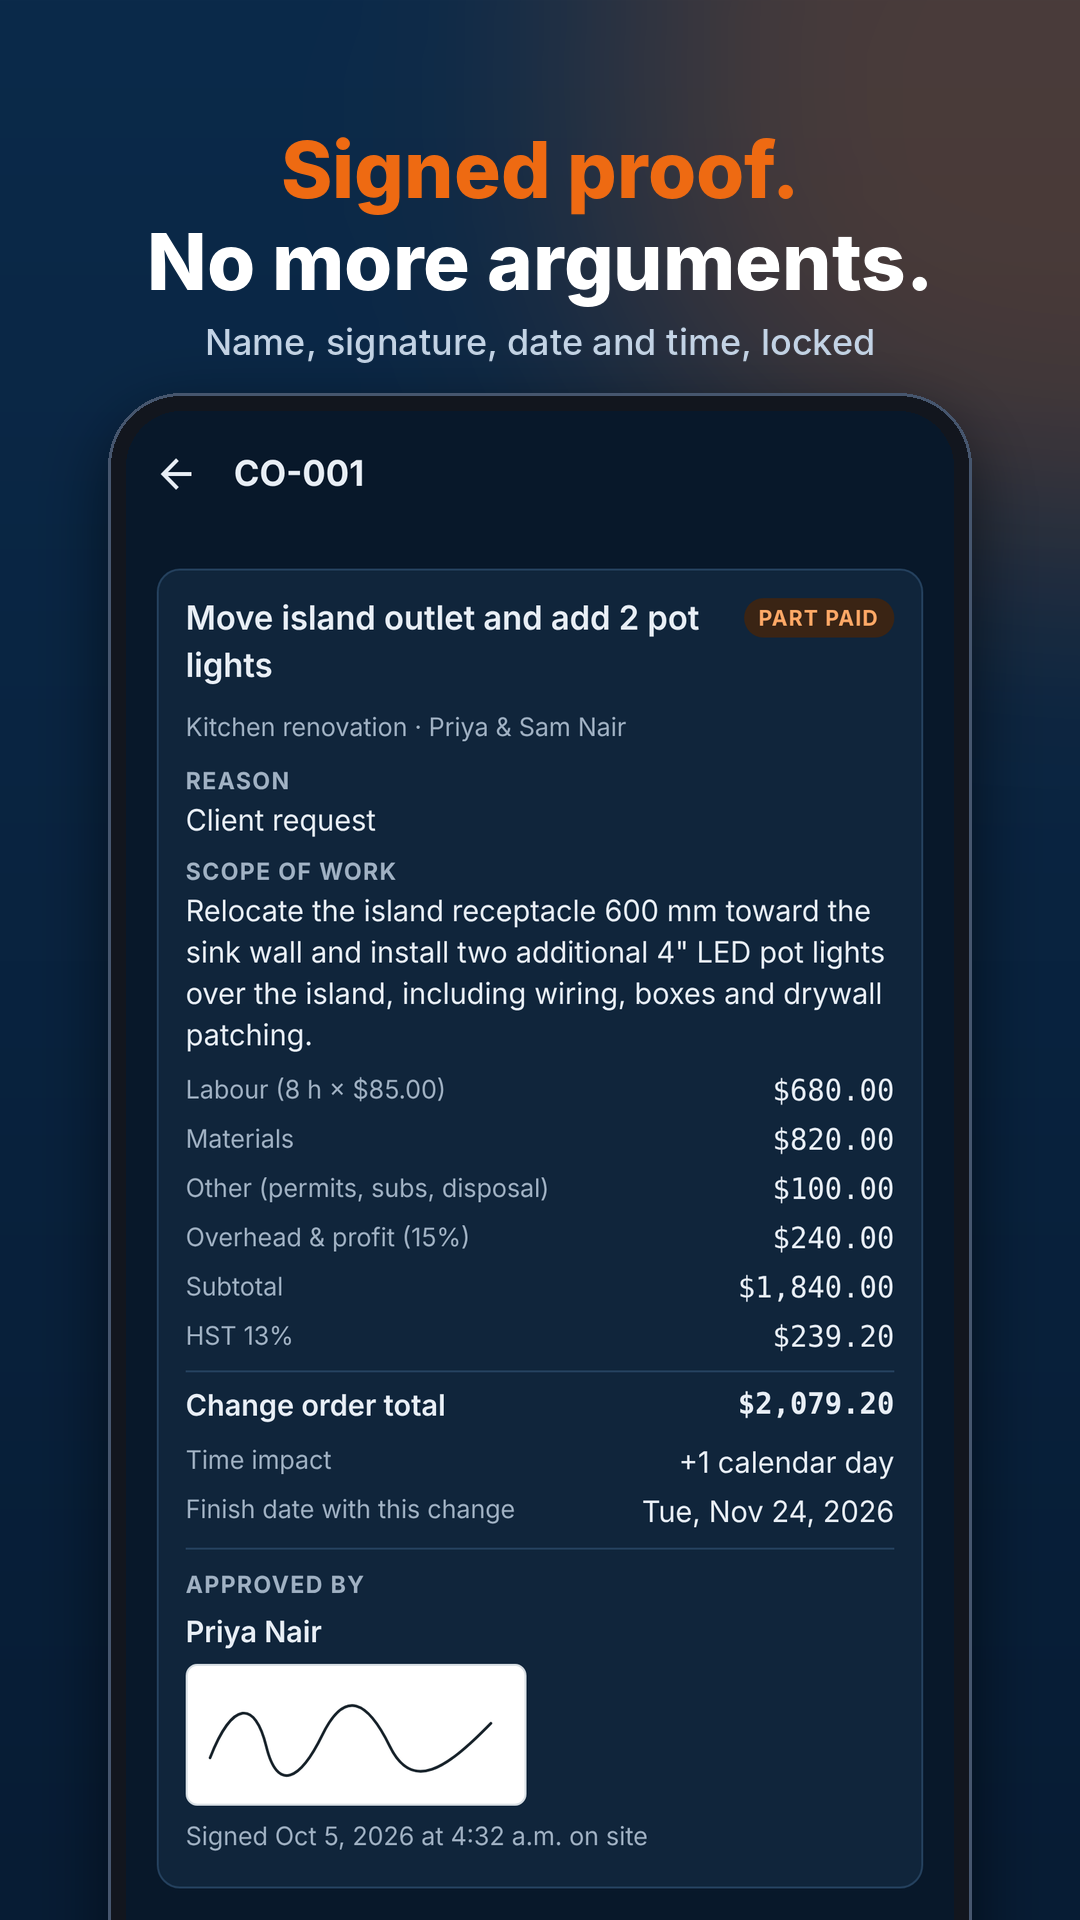
Once it's signed, the change order is locked. It shows the client's name, signature, and the date and time they signed, so there's no argument later.
Tap Share signed PDF to email or text a copy to your client. The signed change order stays with the job, so it makes it onto your final invoice.
Step 7
Track who owes you
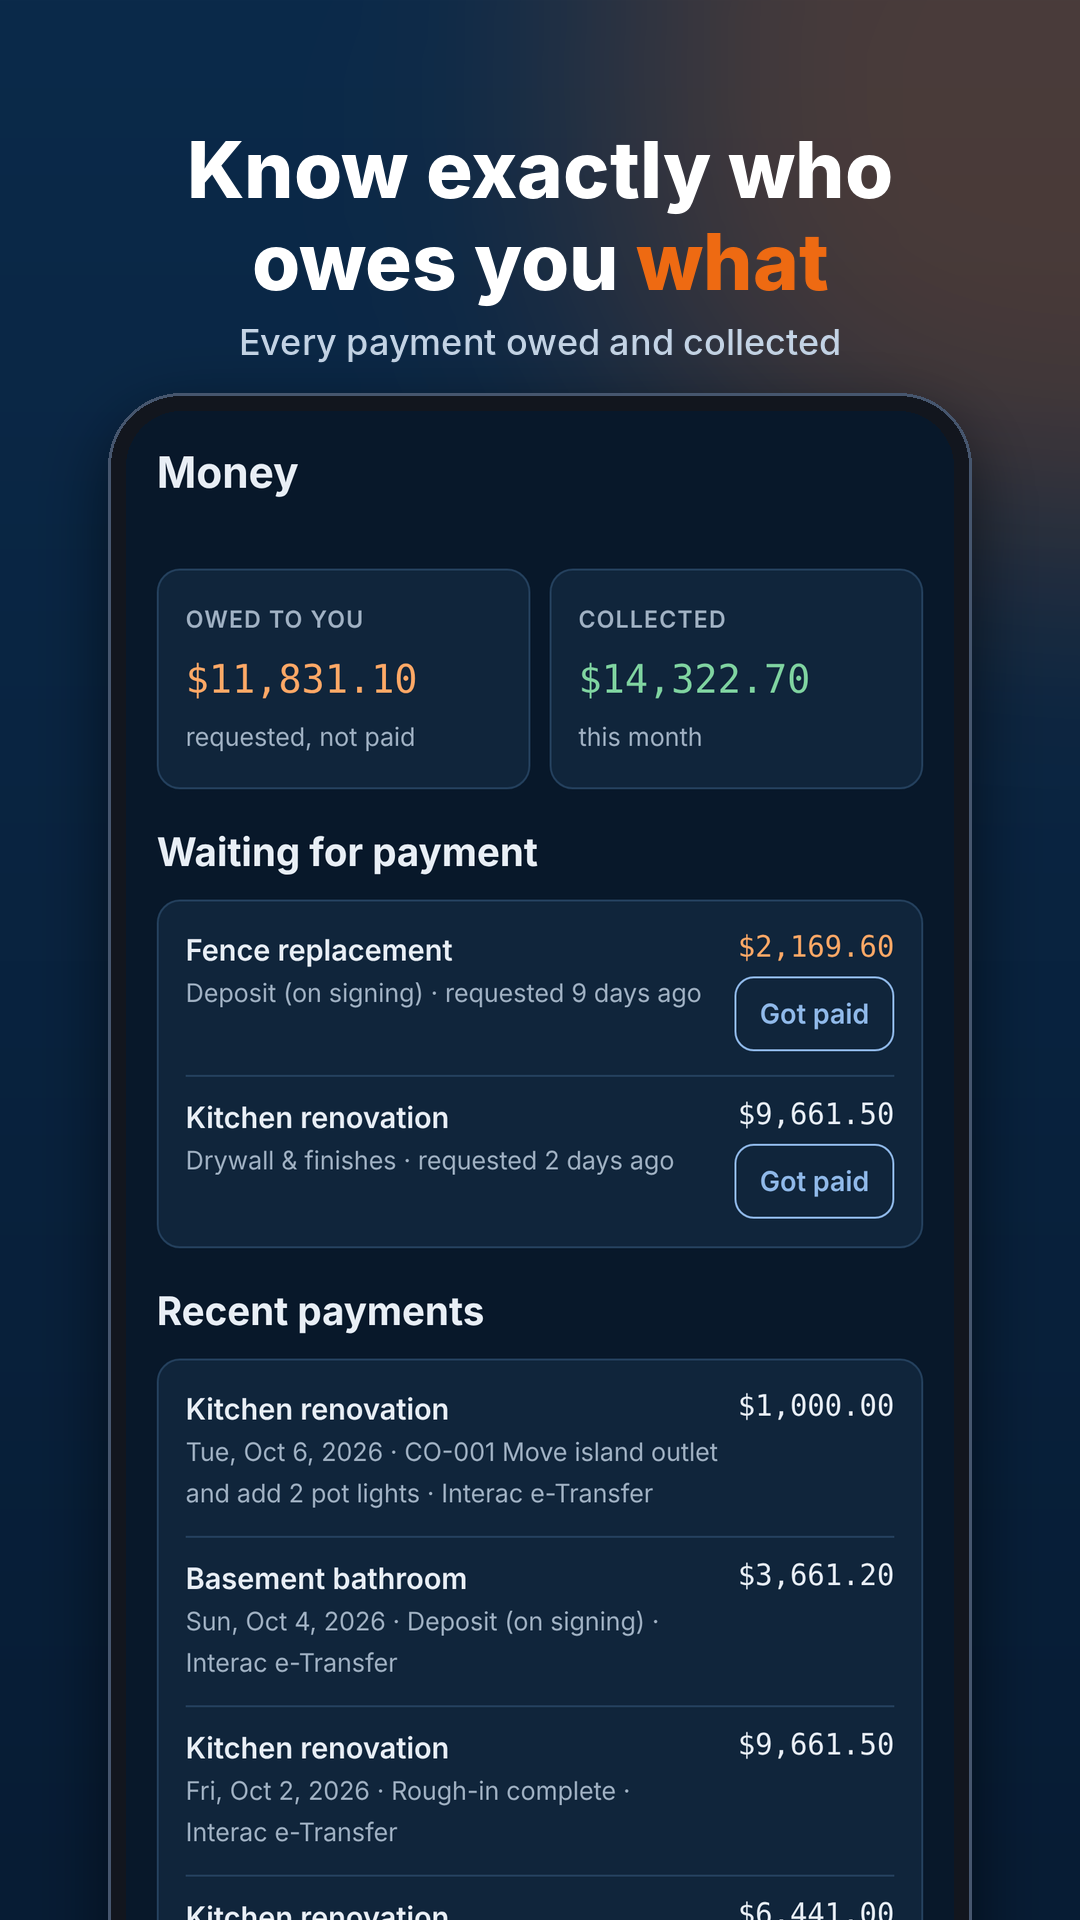
The Money tab shows everything in one place:
- Owed to you and money collected this month.
- Waiting for payment: tap Got paid when the money comes in.
- Recent payments: every payment, by job.
Step 8
Your data
- Download your data: go to More › Download my data to save an Excel file of your jobs, change orders and payments.
- Delete your account: go to More › Delete my account. Learn more.
Need help?
See our Support page or email info@jobguardpro.ca. We reply within 1 to 2 business days.